The system has two different types of aircraft parts logging; project and inventory.
New
The logging form contains a lot of fields. Required fields are indicated with an asteriks (*). You cannot save an item without a photo.
For any part logged, if there are customs details associated with the parent (engine or airframe), it will inherit the same customs status.
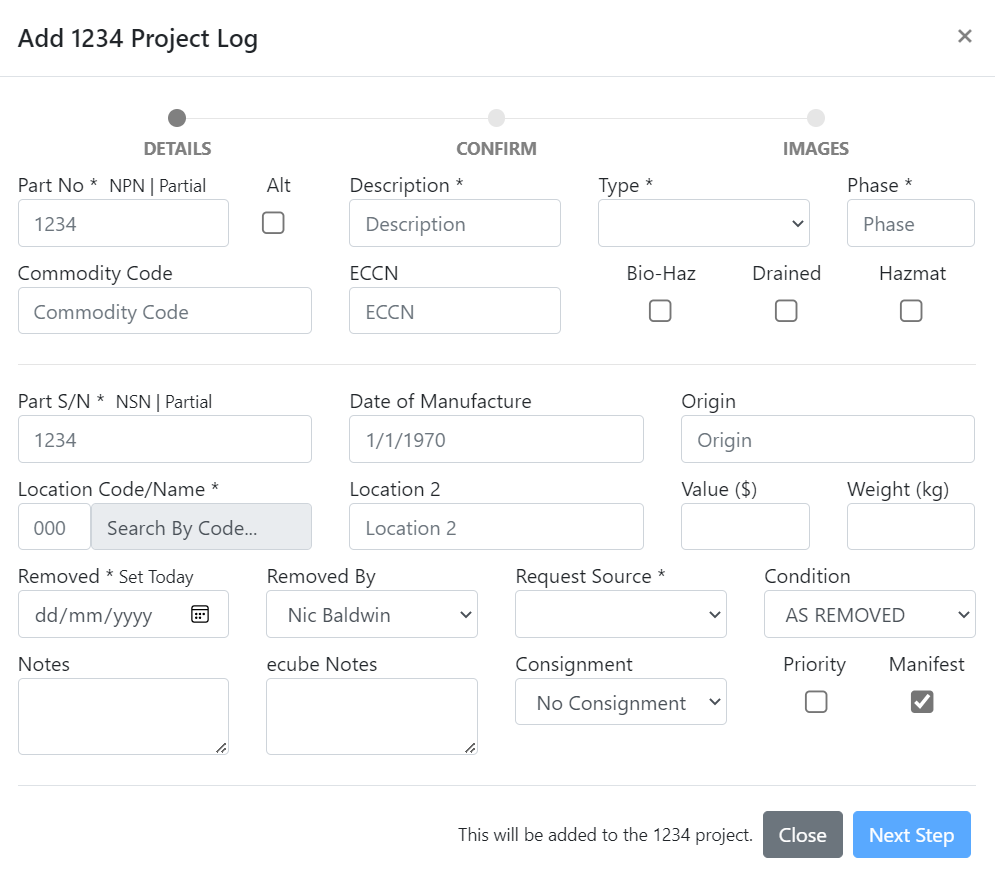
Required indicates mandatory fields. Restricted are only allowed to be edited by authorised parties.
| Field | Printed on Tag | Description |
|---|---|---|
| Part Number | Yes | Required The part number of the item. Use NPN if it does not have one or partial if it is unreadable as this will ensure that it isn't used for part detail lookups. When you click away from the box, it will look up the part details and populate the form if anything is found. |
| Alt Part # | No | The secondary part number |
| Origin | No | Where the item has originated from |
| Part S/N | Yes | Required The serial number of the item |
| Date of Manufacture | Yes | The date that the item was manufactured |
| Location | Yes | Required The generic location on the aircraft |
| Removed By | Yes | Required The tech who removed the item |
| Checked By | No | Required The person logging the item in |
| Date Removed | Yes | Required The date the tech removed the item |
| Location 2 | Yes | The specific location on the aircraft |
| Description | Yes | Required The description of the item |
| Value ($) | No | The value |
| Weight | No | The weight |
| Commodity Code | No | The customs commodity code |
| ECCN | No | The customs ECCN |
| Priority | Yes | Whether the item a priority (will store images and tag in PRIORITY folder) |
| Hazmat | Yes | Whether the item is hazardous material |
| Notes | Yes | Notes available to customer |
| ecube Notes | No | Notes only visible by ecube |
| Bio-Hazard | Yes | Whether the item is a bio-hazard |
| Drained | Yes | Whether the item is drained |
| Condition | Yes | Restricted This set the condition of the part whether serviceable or as removed |
| Type | No | Required The part type, whether ESD or Mech. |
| Manifest | No | Restricted This dictates whether the item is on the manifest. |
| Consignment | No | The consignment for the item (will store images and tag in consignment folder) |
Note: If you open a part with no type specified, you will need to declare it before saving.
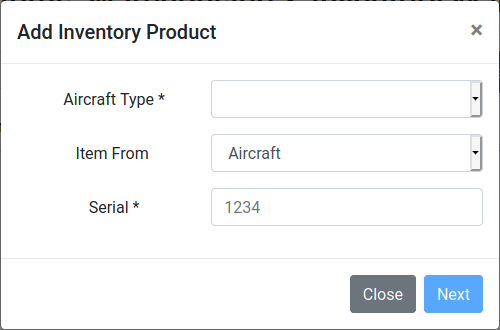
Inventory Specific
The only difference between project and inventory logging is that the inventory will ask for additional data before opening the logging form. The reason for this is that it needs to know what type of part you are logging so it can perform part detail lookups.
| Field | Description |
|---|---|
| Facility | Required Conditional This field will only show if a facility is not selected globally. |
| Aircraft Type | Required The type of aircraft the item is from |
| Item From | Required This is whether the item is from the airframe or engine. Think of this as whether the item would fall under an engine or airframe project |
| Serial | Required The serial of the parent item (engine or airframe) |
List
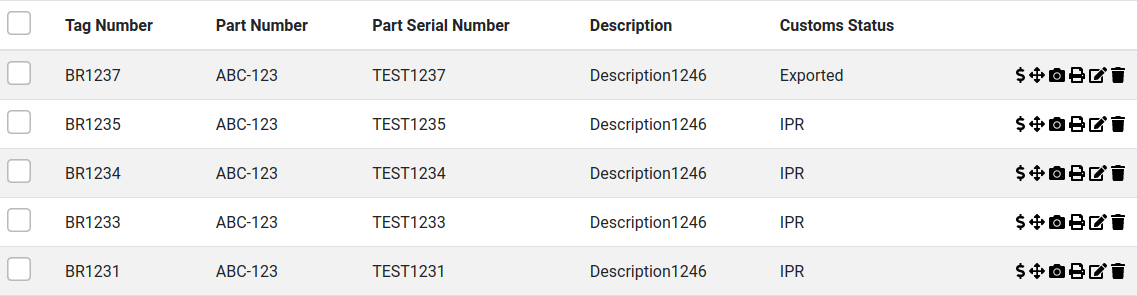
A list of all the parts logged for that project or that inventory will be listed in a table.
If set to show deleted items, these rows will have a red background.
If an item has shipped, the row will have a green background.
Controls
There are a number of control buttons available for the list of items in the top bar.


- The left arrow in the top left hand side corner will return to the home page.
- The "Orders" button will load all the orders which have been created for the inventory or project.
- The "Storage" button will load all the storage packs which have been created for the inventory or project.
- The "Manifest" button will load all the items and generate a spreadsheet of the data. Please note that the system may have to retrieve a large quantity of data and this may take a few moments to execute.
- The "Search" button will open a search box where you search for a particular item. You can search on multiple criteria at once by splitting each criterion with a comma.
- The "Filter" button will open a form allowing you to filter by storage packs.
- The "New" button will open the logging form. See New.
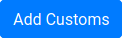
If any of the items are selected, more buttons will appear.

- "Add to Consignment" will load the consignment form. See Consignment.
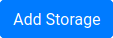
- "Add to Storage" will load the storage form. See Storage.
- "Add Customs" will load the customs form. See Customs.
Project Specific

- The "Check Sheet" button will open a date selector where you can retrieve a list of all the items logged on a particular date.
- The "Load All" button will load all the items for the project or inventory. Please note that the system may have to retrieve a large quantity of data and this may take some time to execute.
Inventory Specific

The system allows any number of inventories to be stored. When navigating to the inventory page from the home page, it will load the last viewed inventory. The inventory you are currently viewing is displayed in the dropdown menu of the controls bar at the top of the page. In order to view a different inventory, simply select another from the dropdown menu.
If all the selected items are from the same aircraft an "Alter MSNs" button will appear. This button will load the inventory form and alter the aircraft or engine that the parts have come from. See Inventory Logging for details on this form.
Select All
In order to select all projects on the page, hit the check box on in the header row.

View Customs
Clicking the dollar icon will allow you to view customs details.  Read more about customs functionality
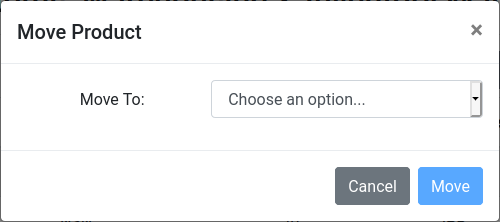
Move
Clicking the arrows icon will allow you to move the item between inventories and the aircraft project. 
Photos
Clicking the camera icon will allow you to open the edit form and jump straight to the photos page.  Read more about the logging form
Tag
Clicking the printer icon will print the tag. 
Please note that this will load a new tab in Firefox and Microsoft Edge.
Edit
Clicking the camera icon will allow you to open the edit form.  Read more about the logging form
Delete
Clicking the bin icon will open a confirmation window. If confirmed, the item will be permanently deleted along with any images. 
Details
If you require the full details of an item, clicking the row will open the details page.
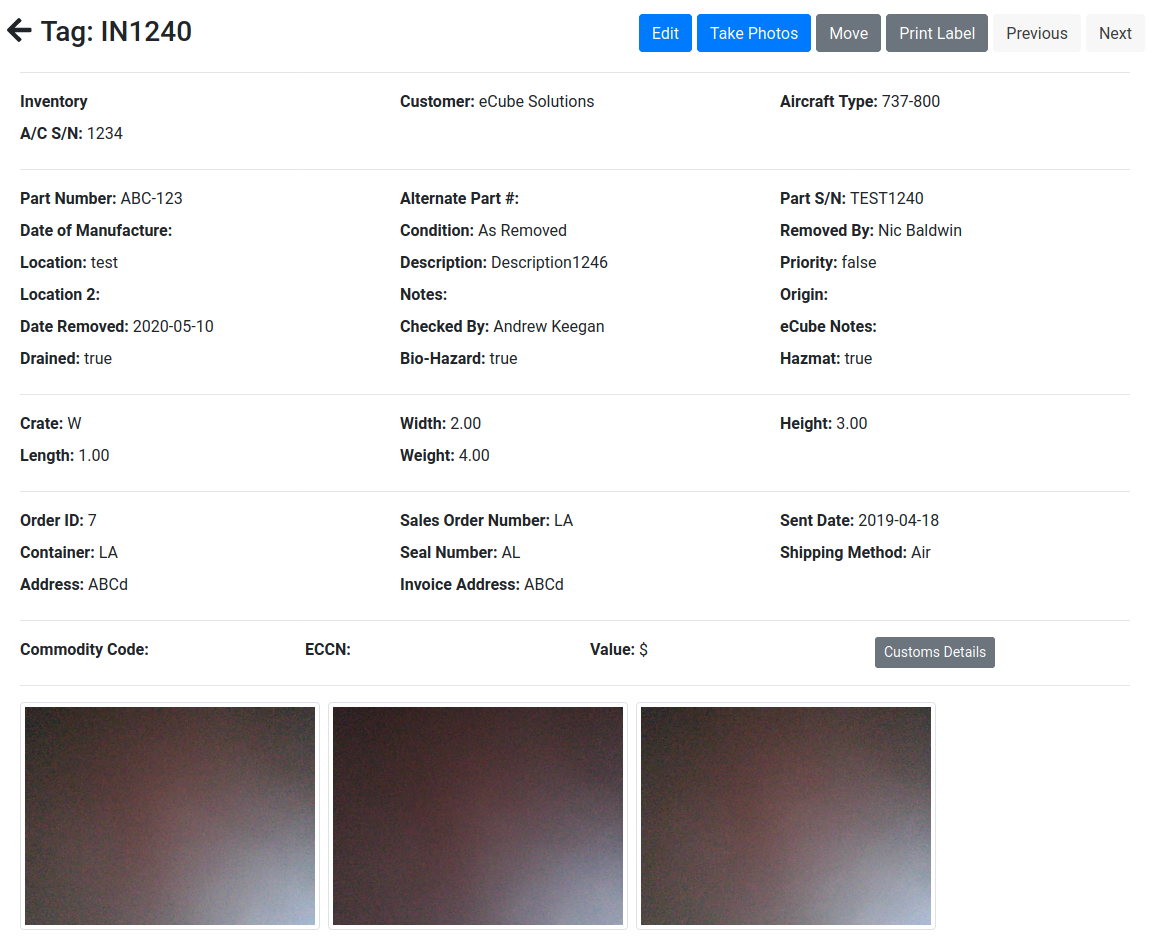
If the item is not in a storage pack, it will omit this section of data.
If the item is not on an order, it will omit this section of data.
Controls

The control allow you to edit, alter photos, move the item, print the tag or move to another tag.
- The left arrow will go back to the inventory or project the item is in.
- The "Edit" button will bring up the logging form filled with the existing data and photos.
- The "Take Photos" button will bring up the logging form filled with the existing data and photos on the photos page.
- The "Move" button will load the form which allows you to select which inventory to move an item to or back to a project if a project exist for the MSN.
- The "Print Label" button will load the tag and allow you print it.
- The "Previous" button will load the item details for the previous tag number.
- The "Next" button will load the item details for the next tag number.